搭建 Git 伺服器并利用 cgit 作为前端
本文预设环境为: Arch linux x86_64 with Nginx
搭建 Git 伺服器
首先我们需要安装 git 包
本文这里只阐述利用 ssh 连线的 git 伺服器
由于系统预设已经添加了 git 用户,这里我们只需要做两个小修改即可
新建一个目录 /srv/git 并且记得把所有者设置为 git
$ sudo mkdir /srv/git
$ sudo chown git:git /srv/git
然后修改 /etc/passwd 将其 home 目录从 / 设置成 /srv/git
接着编辑 /usr/lib/systemd/system/[email protected]
在 ExecStart 栏位把 --base-path 的参数修改为 /srv/git
全部修改完以后,我们就可以测试一下
首先切换到目录 /srv/git 中(如果没有权限的话,可以尝试用 root 用户操作(sudo -i))
使用下列命令新建一个 repo
# mkdir test.git
# cd test.git
# git init --bare
# cd ..
# chown -R git:git test.git
而后本地如果要 clone 的话,首先将自己的 ssh key 添加到 /srv/git/.ssh/authorized_keys 中
使用 git clone git@<your host name>:test.git 来 clone
$ git clone git@githost:test.git
Cloning into 'test'...
warning: You appear to have cloned an empty repository.
一般可以 clone 的话,其他的操作也不会有什么问题
配置 cgit
首先安装 cgit
它有几个可选的依赖,可以自行选择是否需要安装
Optional dependencies for cgit
    groff: about page using man page syntax
    python-pygments: syntax highlighting support
    python-docutils: about page formatted with reStructuredText
    python-markdown: about page formatted with markdown
    gzip: gzip compressed snapshots
    bzip2: bzip2 compressed snapshots
    lzip: lzip compressed snapshots
    xz: xz compressed snapshots
    zstd: zstd compressed snapshots
    mime-types: serve file with correct content-type header
配置 Nginx
安装 fcgiwrap
然后启用 fcgiwrap.socket
$ sudo systemctl enable --now fcgiwrap.socket
以下是参考的 nginx server 配置文件
如需启用 ssl 可以参考往期的文章
server {
    listen                80;
    server_name           git.example.com;
    root                  /usr/share/webapps/cgit;
    try_files             $uri @cgit;

    location @cgit {
      include             fastcgi_params;
      fastcgi_param       SCRIPT_FILENAME $document_root/cgit.cgi;
      fastcgi_param       PATH_INFO       $uri;
      fastcgi_param       QUERY_STRING    $args;
      fastcgi_param       HTTP_HOST       $server_name;
      fastcgi_pass        unix:/run/fcgiwrap.sock;
    }
  }
配置完成后应使用 nginx -t 测试配置文件的有效性。
配置 cgitrc
我这里直接使用预设配置
配置文件: /etc/cgitrc ,由于这个文件是写死的,出费用环境变数改,或者重新编译 cgit ,所以我就使用预设的路径了。
#
# cgit config
#

css=/cgit.css
logo=/cgit.png

# Following lines work with the above Apache config
#css=/cgit-css/cgit.css
#logo=/cgit-css/cgit.png

# Following lines work with the above Lighttpd config
#css=/cgit/cgit.css
#logo=/cgit/cgit.png

# Allow http transport git clone
#enable-http-clone=0


# if you do not want that webcrawler (like google) index your site
robots=noindex, nofollow

# if cgit messes up links, use a virtual-root. For example, cgit.example.org/ has this value:
virtual-root=/
我们为了简洁名了,把仓库的设置独立出来,放在其他的文件。只需要再上面的配置文件中添加一行 include=/path/to/repos 即可
#
# List of repositories.
# This list could be kept in a different file (e.g. '/etc/cgitrepos')
# and included like this:
#   include=/etc/cgitrepos
#

repo.url=test
repo.path=/srv/git/test.git
repo.desc=This is my git repository
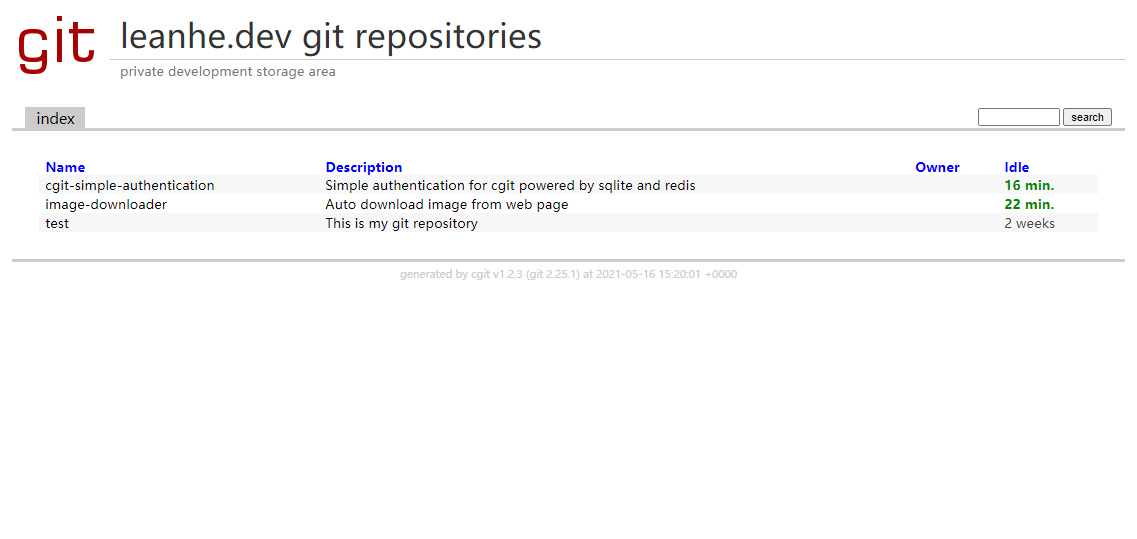
填写这个配置后访问配置的域名,应该就可以看到已经将仓库内容 show 出来了。
鉴权
当然,我们配置的这个是任何人都可以访问的。之所以这篇文章鸽了这么久,因为我在写鉴权的程式。
如需简单的鉴权,可以参考这个项目 cgit-simple-authentication ,这个项目提供了简单的对仓库的分权限控制。
